Scenario - Virtual Machine snapshots with Portworx
In this scerario, we will create a virtual machine snapshot.
We have created a new virtual machine that we will be using for this excercise.
Virtual Machine Snapshots
Task 1: Create a VolumeSnapshotClass
In order to take snapshots, we need to configure a VolumeSnapshotClass.
Run the following from our terminal tab:
cat << EOF | oc apply -f -
---
apiVersion: snapshot.storage.k8s.io/v1
kind: VolumeSnapshotClass
metadata:
  name: px-csi-snapclass
  annotations:
    snapshot.storage.kubernetes.io/is-default-class: "true"
driver: pxd.portworx.com
deletionPolicy: Delete
parameters:
  csi.openstorage.org/snapshot-type: local
EOF
Task 2: Take a snapshot of our new VM
Log in to the OpenShift Console.
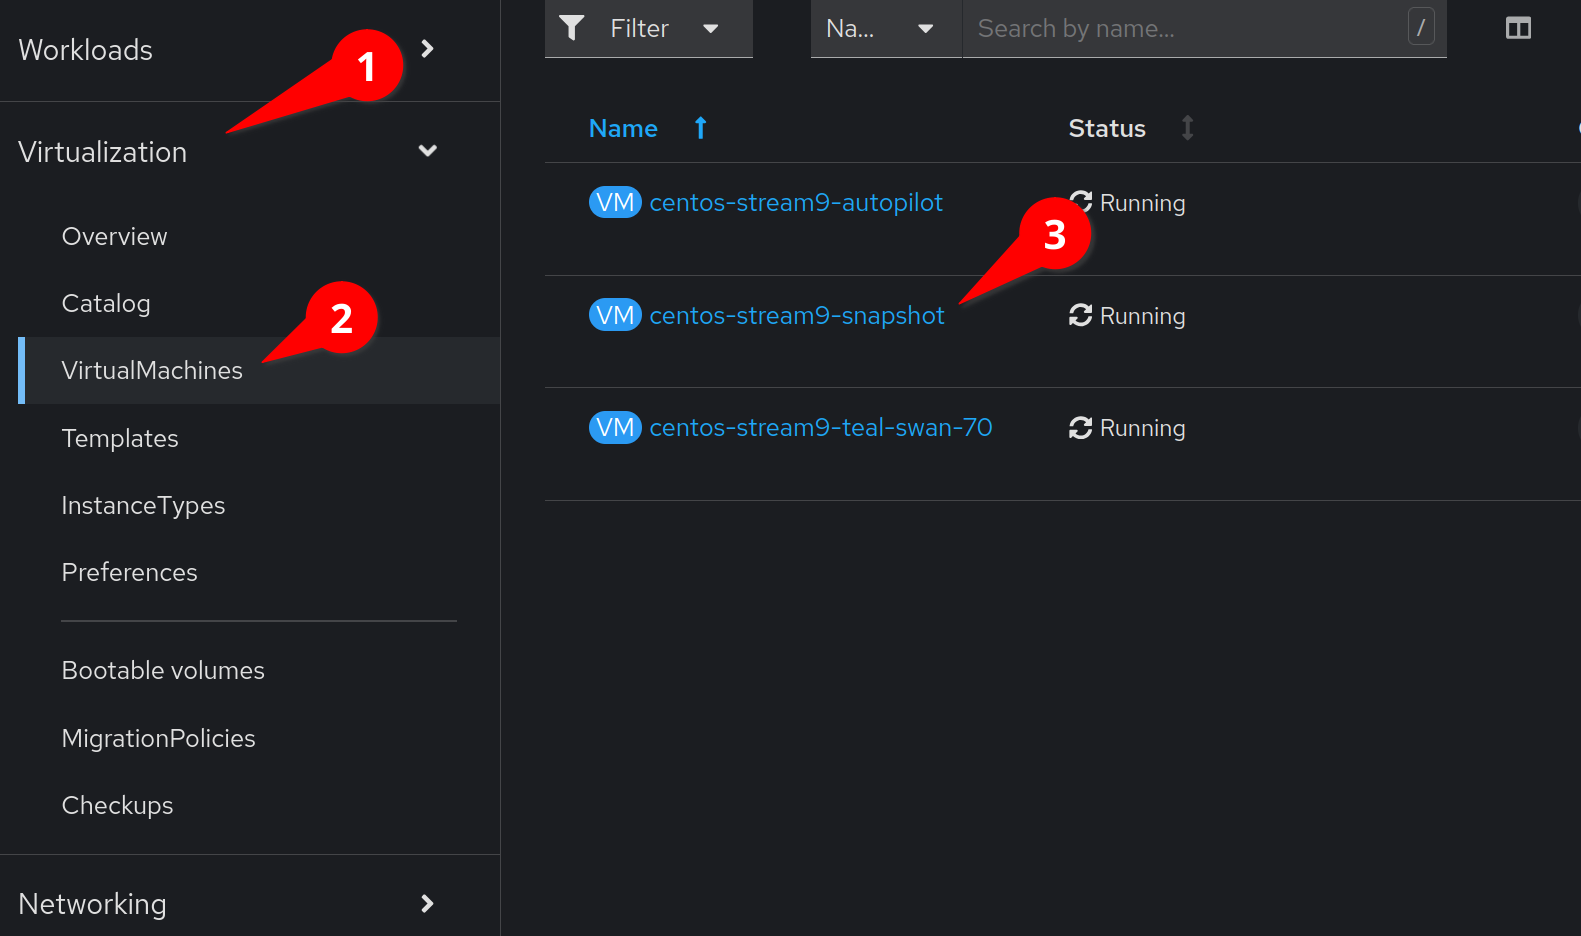
Click on the Virtualization menu item, followed by VirtualMachines.
We can then find the virtual machine we will be using for this snapshot.
Click on the VM labeled centos-stream9-example.
Navigate to the Snapshots tab and select Take Snapshot
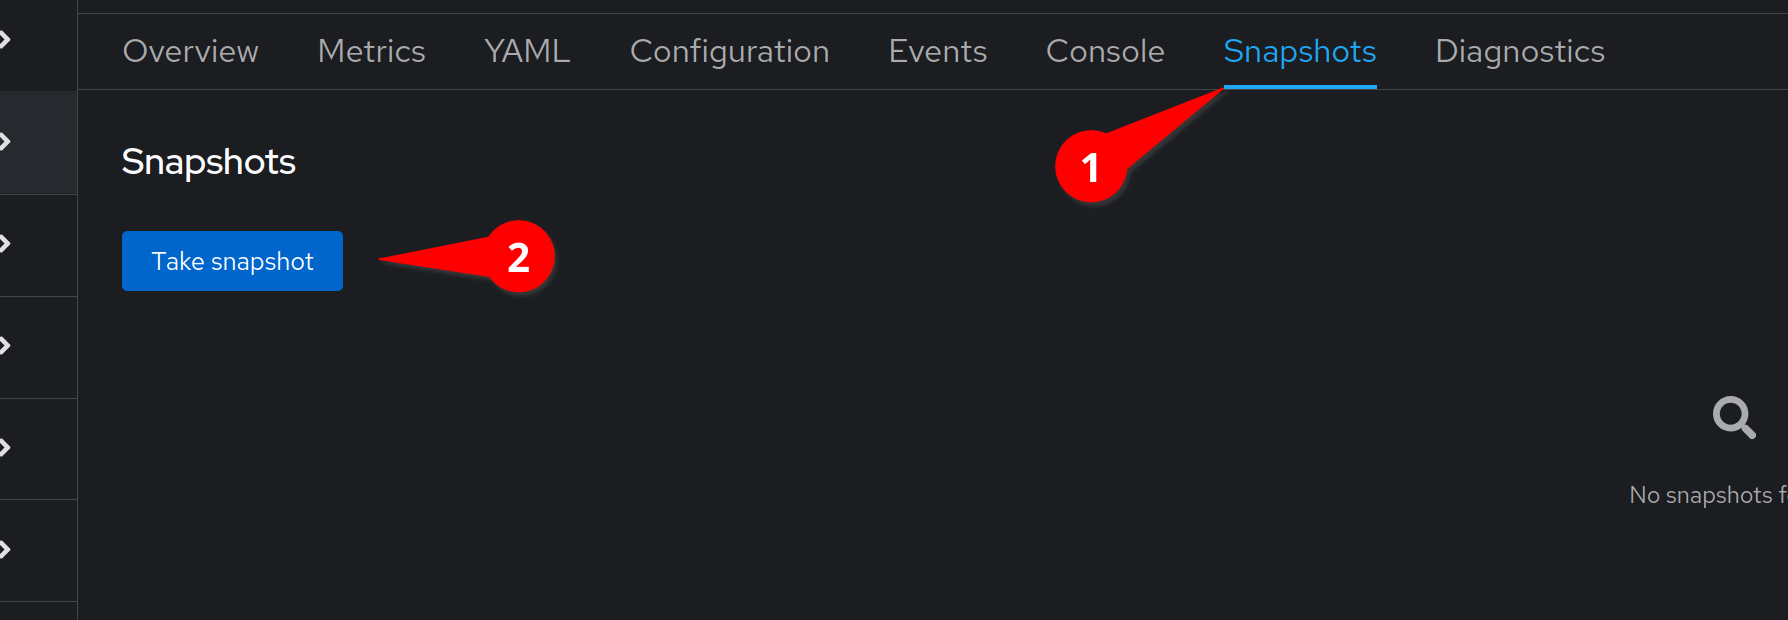
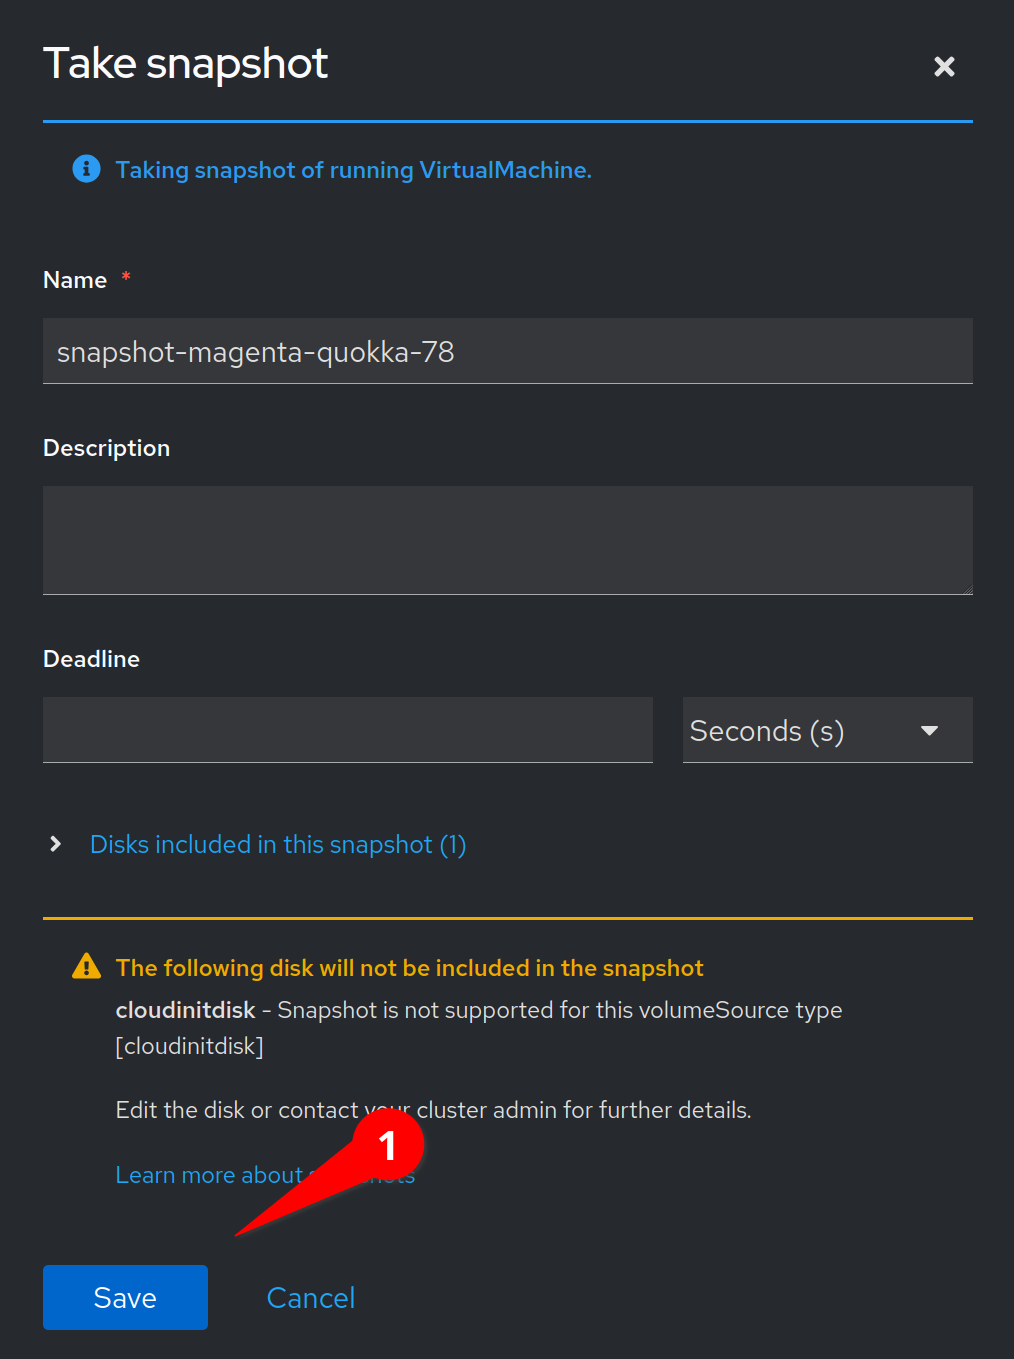
We can accept the default and select Save
You will see a warning that our cloudinitdisk will not be
included in this snapshot. The cloudinitdisk is only used to configure
our virtual machine and provide customizations. We can safely ignore
this warning.
Task 3: Make a change to our VM
Let’s switch back to the command line. To make a change, we are simply going to make a change to our running virtual machine.
Let’s accidently delete an important file:
virtctl ssh cloud-user@centos-stream9-example -i ~/.ssh/id_rsa -t "-o StrictHostKeyChecking=no" -c 'sudo rm /etc/fstab'Oh no! /etc/fstab is an important file for the operation of our linux system.
We can verify that the file is indeed missing by running:
virtctl ssh cloud-user@centos-stream9-example -i ~/.ssh/id_rsa -t "-o StrictHostKeyChecking=no" -c 'cat /etc/fstab'Let’s fix our VM
Task 4: Restore our snapshot
Let’s log back in to the Openshift Console.
Click on the Virtualization menu item, followed by VirtualMachines.
We can then find the virtual machine we will be using for this snapshot.
Click on the VM labeled centos-stream9-example.
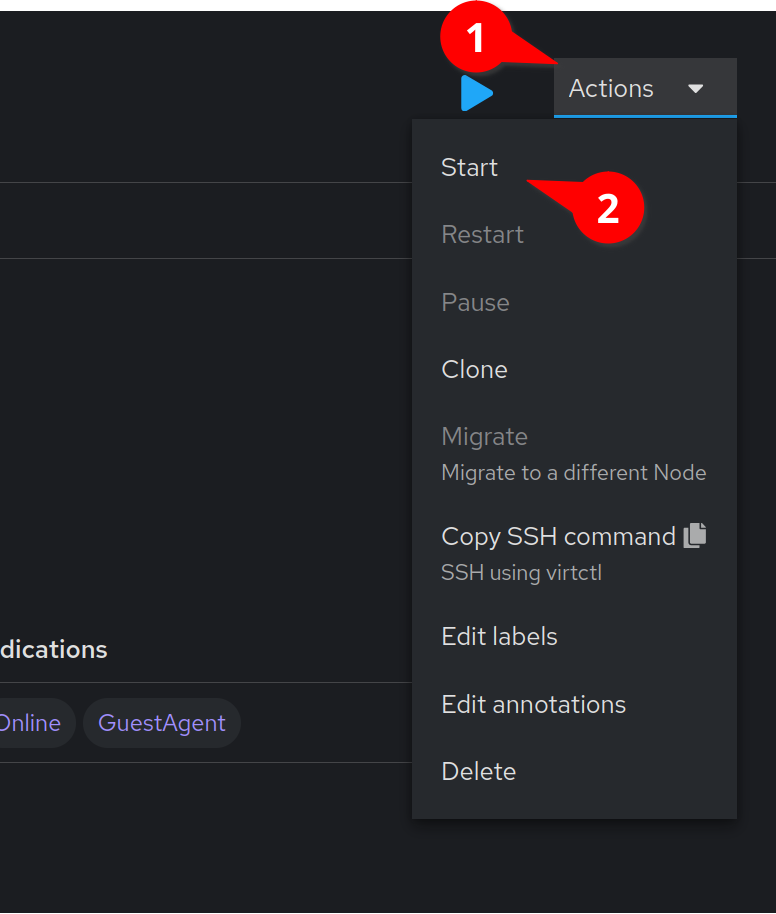
Click on the Actions menu, and select Stop
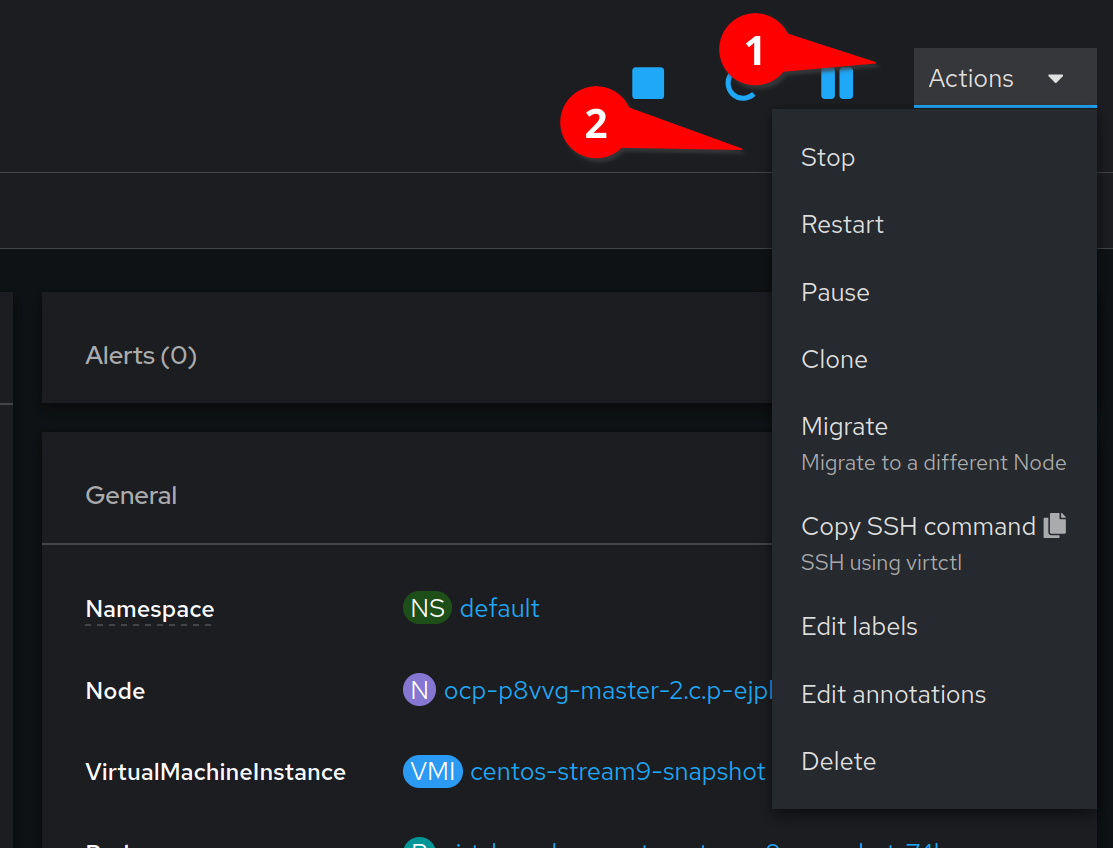
This will stop our running VM so that we can restore our snapshot.
Click on the Snapshots tab. Then click on the kebab menu by the
snapshot we created earlier and click
Restore VirtualMachine from snapshot
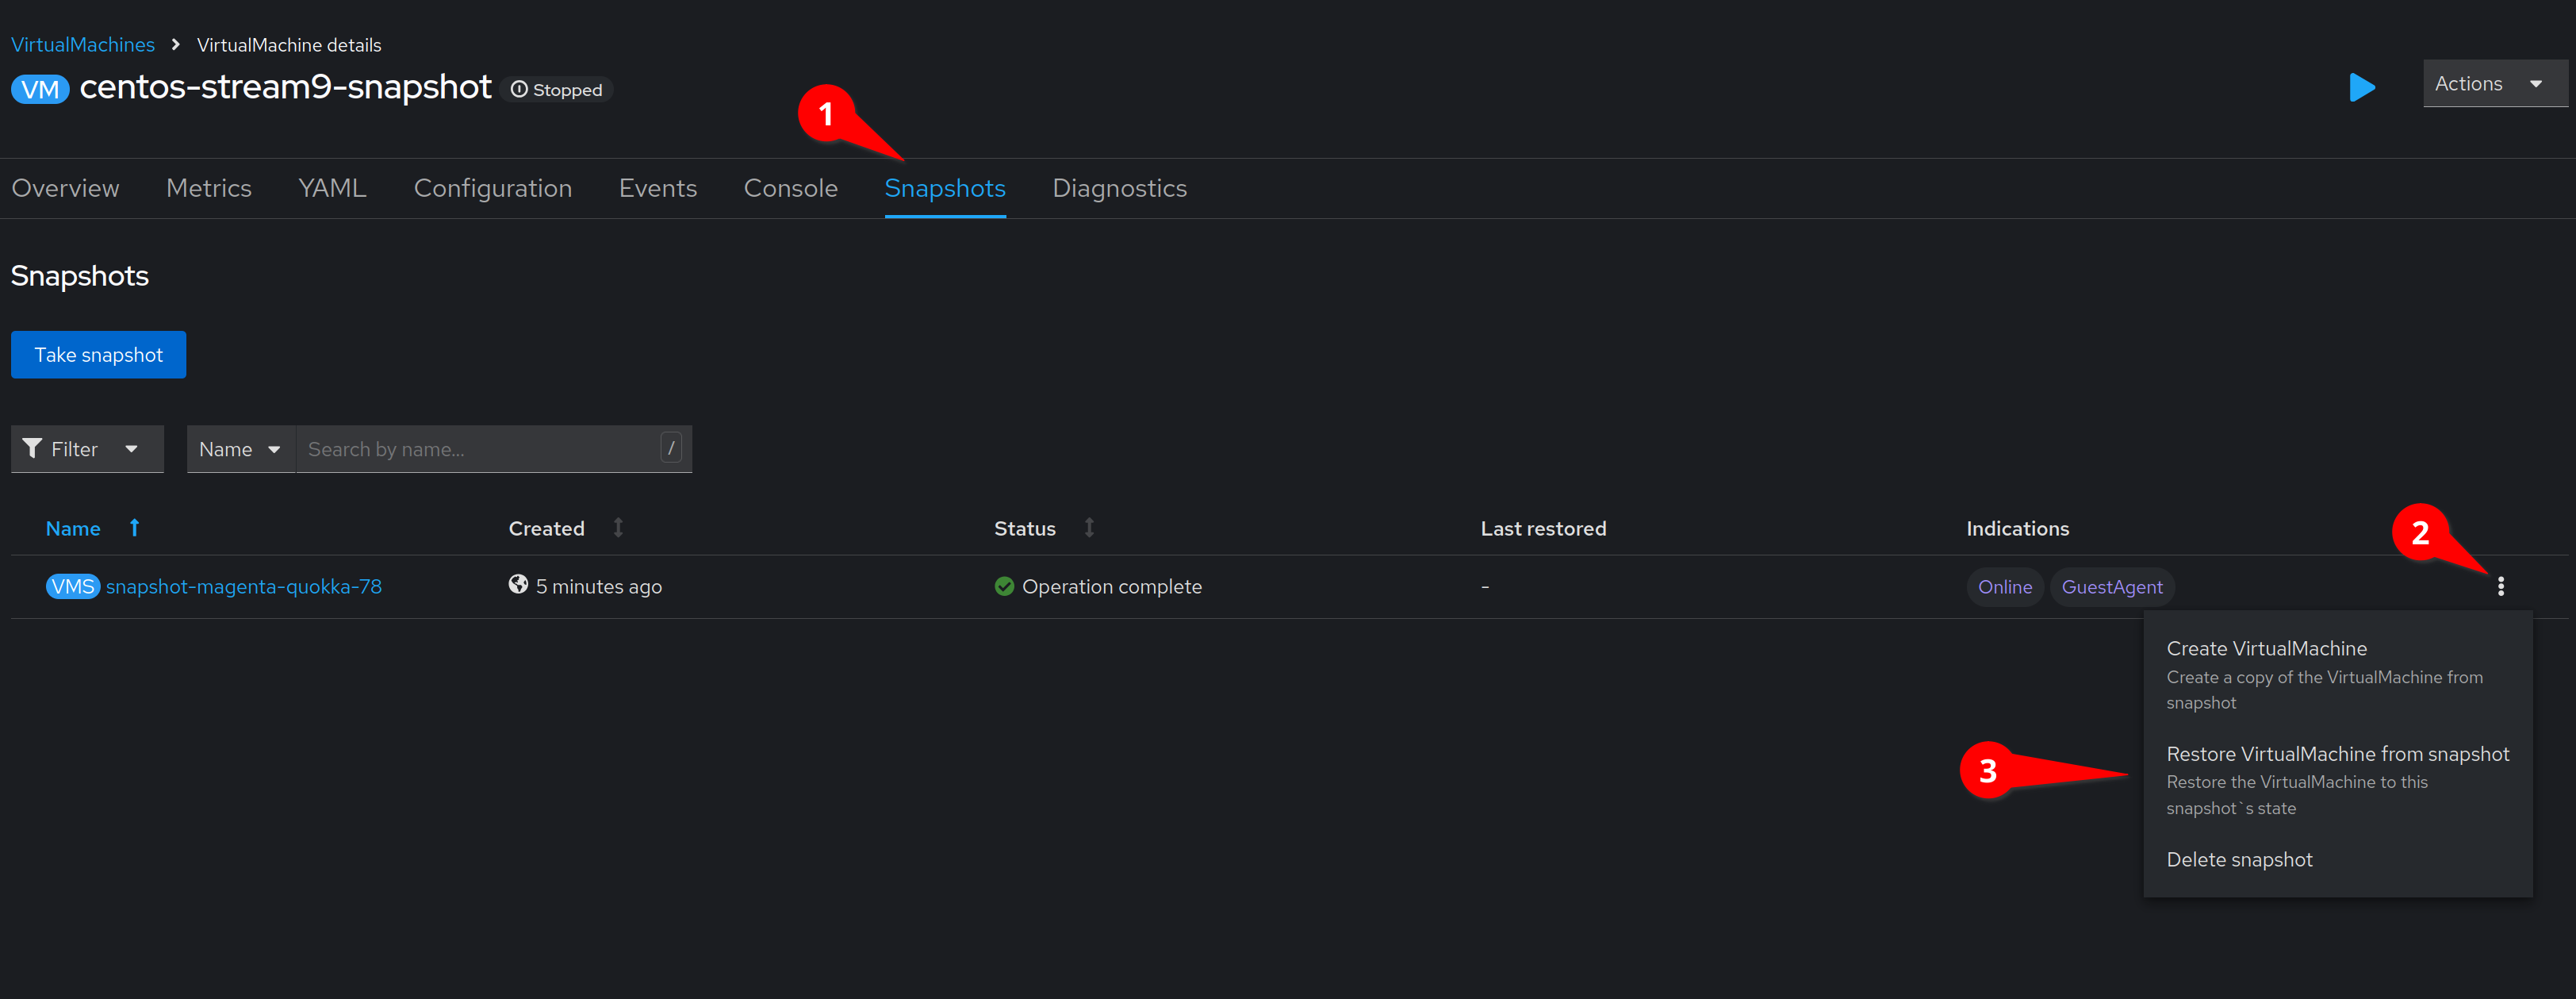
Restoring a snapshot is a distructive operation as it discards all changes that were made to a virtual machine since the snapshot was taken. To avoid loosing data, it is possible to take a snapshot before restoring our virtual machine.
Confirm the restore by clicking the Restore button.
We can now start our virtual machine by clicking on the Action menu
and clicking Start
We can check on the progress of our virtual machine’s boot by clicking
on the Console or Overview tab.
Task 5: Verify our restore
After a couple of minutes, our VM should be running. Let’s verify that our fstab file is back in place:
virtctl ssh cloud-user@centos-stream9-example -i ~/.ssh/id_rsa -t "-o StrictHostKeyChecking=no" -c 'cat /etc/fstab'We can now see that the contents of the /etc/fstab file has been restored!